
Introduction
First things first, you’re going to need access to an OpenAI’s API key. You can either get yourself one from OpenAI’s API key generation page or you could use someone else’s provided he approves you to do so within a room.
Generating a key from OpenAI
- Log-in or create an account.
- Add some credit balance from the Billing page.
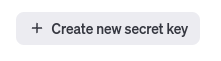
- Head over to the API page and click on the Create new secret key button.
- Complete the captcha if required and copy your key to your clipboard. That’s it, you’re set!
Using someone else’s key
You just have to be invited to his room and he has to setup his key for use within the room. Unfortunately right now you are unable to use solo prompt session broadcasting without your own key.
Platform navigation
Upon logging in to our platform you will see the left panel navigation bar open. You have the following options:
- Open your user settings by clicking your avatar.
- You can switch to a solo prompt session mode by clicking the Switch to solo button.

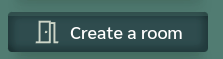
- You can create a room in which you can invite people.
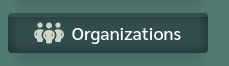
- You can manage your organizations by clicking the organizations button.
User settings
You can setup your OpenAI key you previously generated by pasting it into the appropriate field and you can customize your profile to the provided extend. You may use any personal API keys in any room you have access to instead of using the room’s keys. Having a personal key also enables you to use the solo prompt session mode.

Allow summarization of context: Whenever a message context exceeds the standard limit by the OpenAI API, reinforce the context (compress it) by applying summarization (only for the first time it is used on that specific context). This will spend an unknown amount of tokens running a recursive summarization process. Various models have different context capacities, for example the
gpt-4-vision-previewhas a cap of 128,000 tokens (characters). You can see a full list here.
Solo prompt session mode
Upon switching to solo prompt session mode, you will see 3 core functions as buttons:
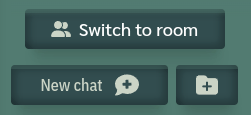
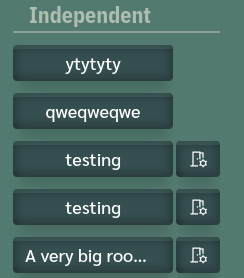
- Switch to room button - you can use this to switch your navigation menu view back to rooms.
- New chat button - you can use this to initiate a new solo prompt session.
- New folder button - you can use this to create a new folder.
Since you have set your previously generated API key in your user settings, you can create a new solo prompt session by clicking the New chat button where you will be greeted with the following interface:
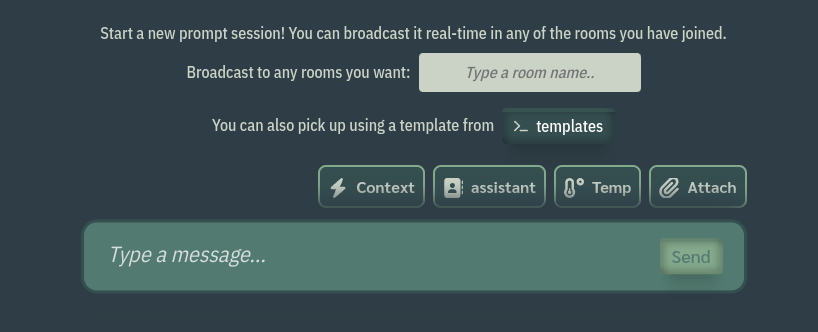
You can directly start broadcasting a solo prompt session to a room you are a part of from the get-go. You can also use a public/organizational/personal template by clicking the templates button and picking/creating one. For details of the message interface either hover over a button on desktop or refer to the message interface section.
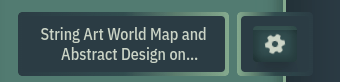
Once the prompt session has been created, you can access its settings and make any change you wish by hovering over it on desktop or tapping on it on mobile and then clicking the grinding gear button:
Solo prompt session settings
Once you click the settings button, you are presented with the following settings options:
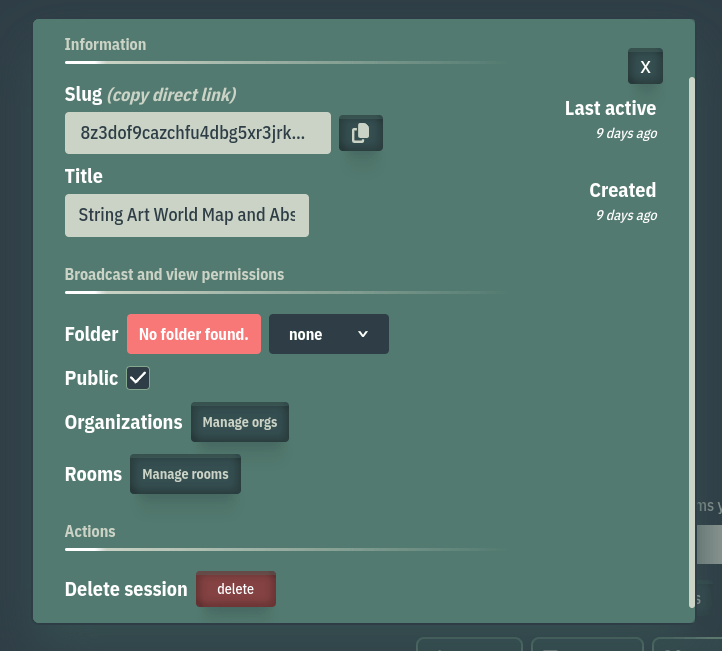
Some settings worth explaining are:
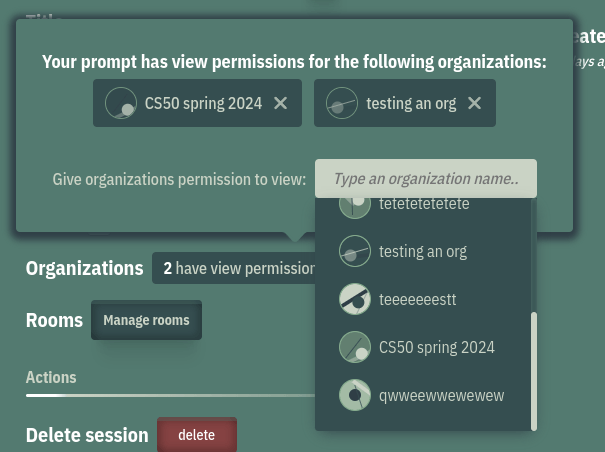
Folder: You may move a session into a folder which you created by using the create new folder button. That way you can quickly manage broadcast & share permissions since folder permissions override individual prompt session ones.
Tip: You can also move a session into a folder by dragging it over the folder of your choice.
Organizations & Rooms: You can directly manage who you wish to have access to the folder of your prompts in combination of rooms and organizations.
Creating a room
After you clicked the Create a room button and filled in the fields with your choices, you will be able to see your freshly created room on your navigation menu:
You can enter the room by clicking the button with the room’s name. By clicking the button next to it, you are presented with the following settings:

Allow summarization of context: Whenever a message context exceeds the standard limit by the OpenAI API, reinforce the context (compress it) by applying summarization (only for the first time it is used on that specific context). This will spend an unknown amount of tokens running a recursive summarization process. Various models have different context capacities, for example the
gpt-4-vision-previewhas a cap of 128,000 tokens (characters). You can see a full list here.
Invite link: You may use that invite link to invite anyone you want to join. If the room is public, a user is still required an invite link to start interacting with the chat.
Room navigation
When you enter a room you are greeted with a top bar panel and a right side panel that opens upon interaction and can be closed. For now we will focus on the room related interactions without any message interface related interactions.
At the right part of the top bar panel you are able to see the following buttons:

Starting from the left, the buttons correspond to the following functions:
- Room notifications: When someone in the room makes a comment or pins a message, everyone who is a member of the room receives an exclusive room-tied notification that a comment or a pin has been made. This makes it easier for everyone to keep track of comments and new pins that were made.
- Room pins: A list of pinned messages and contexts. Pinning messages and contexts can be powerful for highlighting content and context respectively within a collective of users. Reusable contexts can be powerful and apply seamless integration to various kinds of interaction.
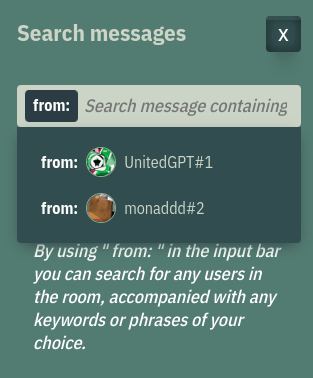
- Search messages: Aside from the platform-wide search which applies exclusively to logged-in and non-logged-in users (you can search private rooms and accessed prompts from the generic explore page), you can also search quickly in the room’s scope.
- Results-only view: Toggle between room view and results-only view for a quick overview of the room’s prompts AI-only results. You can also view them sorted by likes or created at dates.

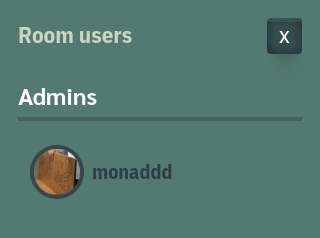
- Users: You can view the current users of the room.
Message interface
The message interface is all about message interaction and the ability to leverage the model’s capabilities and customization to the greatest extend.
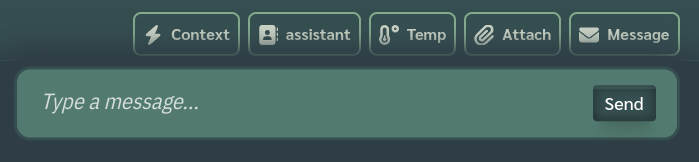
Message interface: Context
You have the ability to fully customize the context of your next prompt. By default within a room, the 20 previous on-going messages are going to used as the context if you are not using a solo prompt session. You can override that by enabling the Context option, or by importing a Context from a room pin.
When you click the Context button which enables custom context, you will see the following shift of the interface:
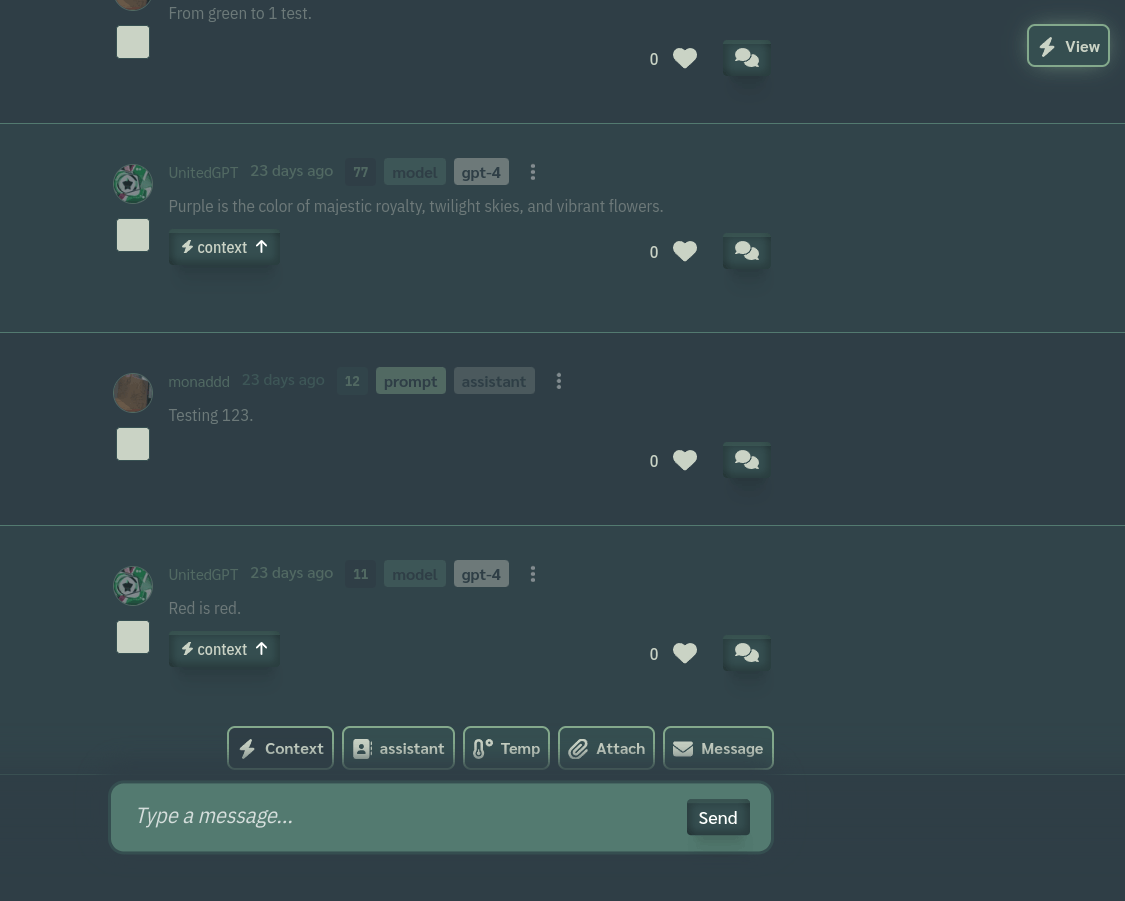
You may notice the View button appearing on the top right. Clicking it opens the right side-bar view so you can view the details current Context of the prompt you want to make. By clicking on any individual checkbox within the room/prompt session, you add the message on the Context.
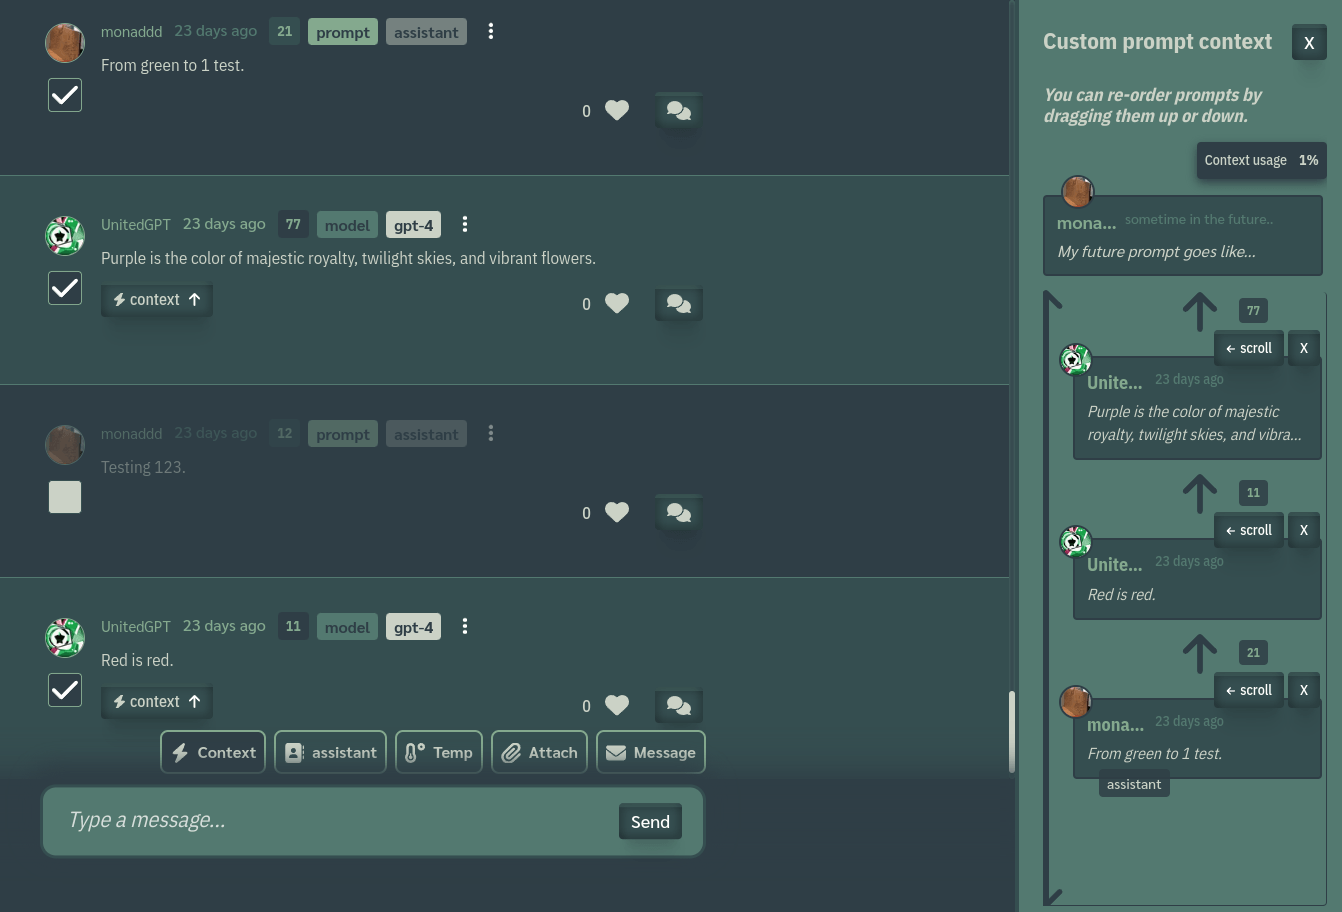
You can see you can also add messages from previous prompt results. Adding a message from a ChatGPT output can be quite helpful in maintaining the model’s focus and accuracy on the context itself. You can also see the size of the context you’re using so you’re aware of any potential overflows and how big they are going to be in case you plan to use summarization on them. Reordering the prompts may or may not be helpful to you in all cases, depending on the case.
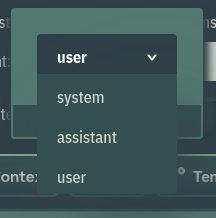
Message interface: Role
Choose the role you want to go with as your prompt for the underlying OpenAI API.
Message interface: Temperature
Set the temperature or the top_p value for the randomness of the prompt output.
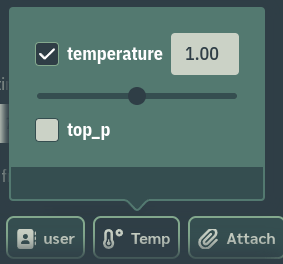
- temperature: What sampling temperature to use, between 0 and 2. Higher values like 0.8 will make the output more random, while lower values like 0.2 will make it more focused and deterministic.
- top_p: An alternative to sampling with temperature, called nucleus sampling, where the model considers the results of the tokens with top_p probability mass. So 0.1 means only the tokens comprising the top 10% probability mass are considered.
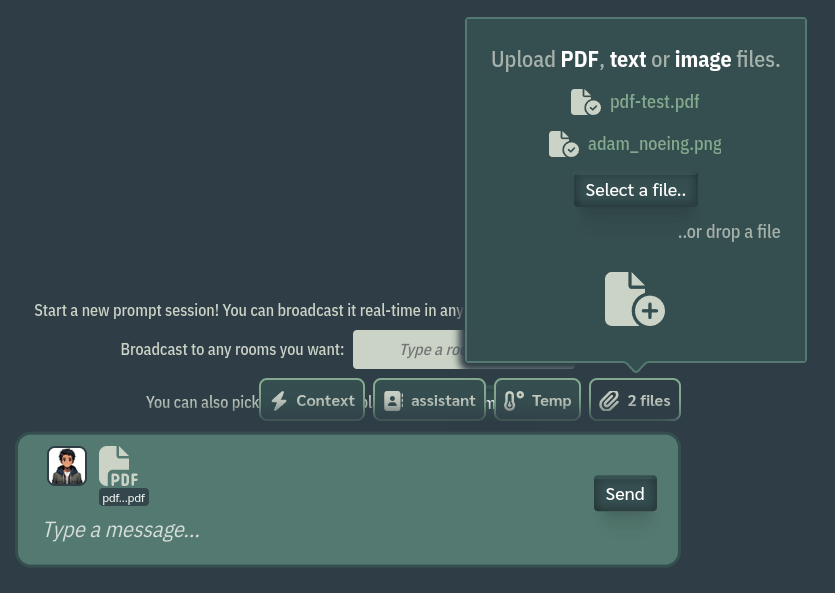
Message interface: Attach
Attach any files and images you want along the prompt. Currently for files only txt and PDF are supported. If your text/PDF files together as a context exceed the context, context summarization will have to be applied or you can’t make a prompt.
Message interface: Message/Prompt
Toggle between message mode and prompt mode inside a room.
Conclusion
This post will keep getting updated as new features and functionality are introduced to the platform. Make sure to drop us a follow to keep up-to-date with the platform news and updates. We wish you a wonderful prompting experience with your friends and colleagues!